The transition from shared hosting to a Virtual Private
Server (VPS) is a simple one. Learning how to set up a VPS, on the other hand,
can be a little more difficult, especially if you've never used the command
line before.
In this article, we'll walk you through the five steps of
setting up a VPS:
- Learn how to log into your VPS using Secure
Shell (SSH)
- Your server is being updated
- Making a new user and changing its permissions
- Activate public key authentication
- Configuring a firewall for your VPS
However, before we get into the technical details, we'll
explain why you'll need to configure your new virtual server. Let's get started
on setting up a VPS!
Why Should You Configure Your New VPS?
When you sign up for a basic hosting plan, your provider
will usually install all of the software you'll need to use it. With shared
hosting, for example, you should have immediate access to a control panel for
your account:
These hosting control panels give you all of the options you
need to set up your account. However, because other people are using the same
machine, you won't be able to change your server's actual settings in most
cases.
A VPS, on the other hand, provides you with your own server
environment. In most cases, your host will only set up basic server software
such as Apache or Nginx, leaving the rest up to you. You may also want to
install a control panel, such as Cyberpanel, for easier management. That means you'll
most likely need to take a few extra steps to get your server'ready,' such as:
- When should you start using a VPS
- Learning how to connect to it and send commands
to it.
- Learning how to install new software and run
updates.
- Creating new user accounts (if needed).
- Installing a firewall
When we say "issuing commands to your server," we
mean something like this:
Rather than a graphical user interface, you will typically
interact with your VPS via the command line (GUI). That can be intimidating at
first, but if you don't mind Googling for the right commands and following some
simple tutorials, you'll quickly get used to it.
You can also install hosting control panels that allow you
to interact with your server via a graphical user interface. However, we won't
go over that in this article because using the command line is often the more
efficient option. Furthermore, learning how to use simple commands will teach
you a lot about server administration, which will undoubtedly come in handy as
your site grows.
5 Steps to Setting Up Your New VPS and Making It Ready to
Use
As you may know, Unix-based systems power the vast majority
of web servers. That means you'll have to use commands that are specific to
that type of Operating System (OS), which aren't the same as those used on a
Windows machine. If you want to learn more about Windows server management,
consult this guide.
With that out of the way, let's get started on setting up a
VPS!
Step 1: Learn How to Log Into Your Virtual Private Server
(VPS) Using Secure Shell (SSH) Access
Aside from using a browser, there are several ways to
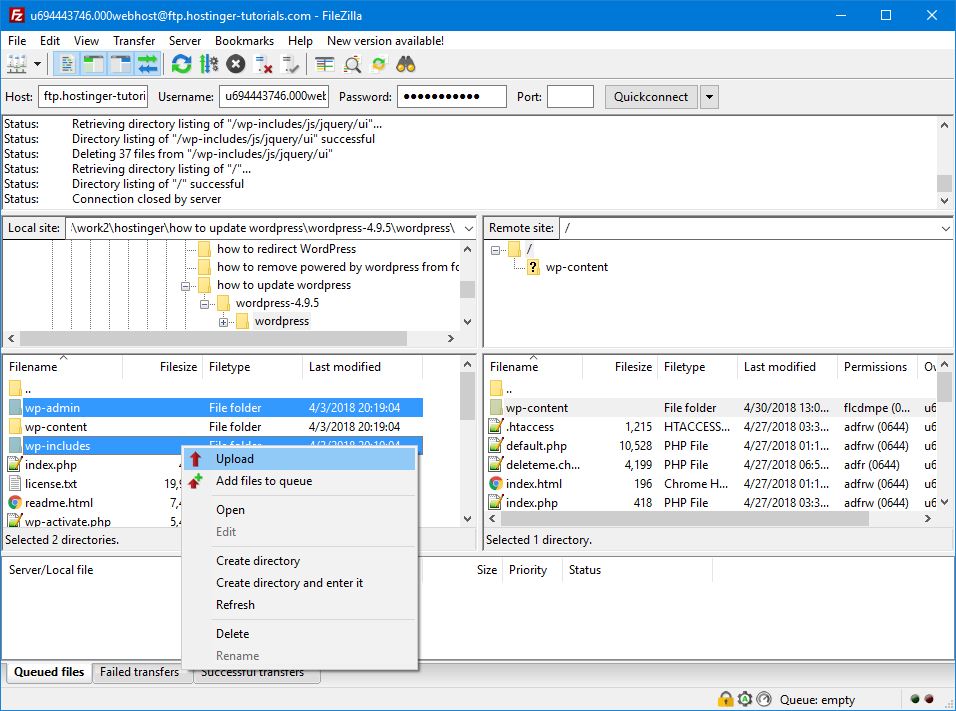
connect to a website. You can, for example, use File Transfer Protocol (FTP) to
upload, download, and edit files on your server:
While FTP is very useful, it does not allow you to issue
commands to your server. You'll need to use Secure Shell (SSH) access for this,
which is a different type of protocol that allows you to connect to remote
servers.
Once you've established an SSH connection to a server,
you'll be able to issue commands to it. SSH is also well-known for its robust
encryption and authentication protocols, which contribute to its high security.
You'll be taking your first steps into server administration by learning how to
use SSH.
When you sign up for a VPS plan, your web host should send
you a set of credentials, which should include:
- The IP address of your server
- A unique identifier (usually root)
- A password your access your root account
In case you're not familiar with the term, a root (or
superuser) account is a user who has complete access and privileges on a given
system. Consider it the equivalent of an administrator, but with far more
authority.
When you set up a VPS, you'll start with a single root
account, which will be used to connect to the server for the first time. If
you're using a Unix-based operating system, you can connect to your server from
the command line.
If you're using Windows, you'll need to first install an SSH
client. We have a soft spot for two clients in particular, the first of which
is Bitvise:
Bitvise is an excellent choice if you want a simple interface that resembles the classic Windows style. However, because you'll be doing the majority of your work from the command line, the style is unimportant.
We also like PuTTY, which has a much more minimalist interface. It does, however, provide a plethora of additional configuration options, making it preferable if you want to dip your toes into server management.
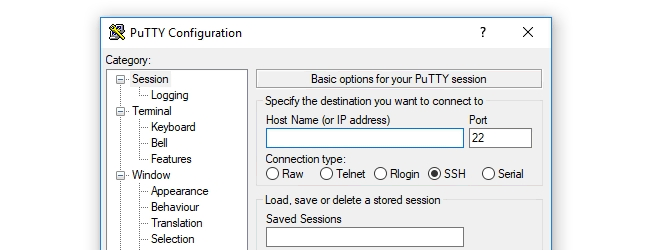
We'll be using PuTTY in our examples for the rest of this tutorial. With that in mind, go ahead and install and then run the programme. You'll see something like this:
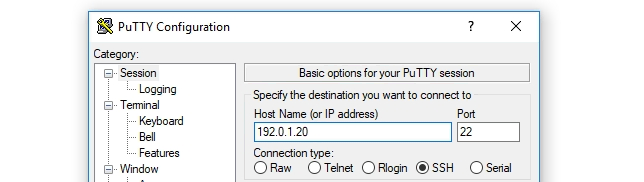
At this point, you must enter your server's IP address into the Host Name (or IP address) field and leave the Port setting at 22:
Below the IP field, you'll notice an option to select the type of connection you want to use. After you've selected SSH, click the Open button.
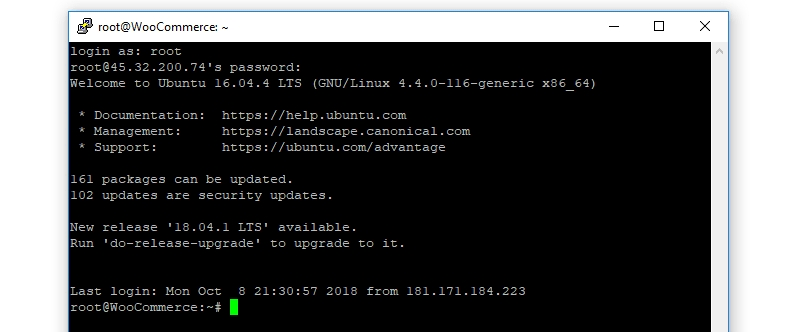
A command line window will now open, prompting you to enter your login information. In this case, root and its corresponding password are:
If your data is correct, you'll see a brief summary of your server's information and a prompt to enter more commands:
That concludes the first step in setting up a VPS. However, don't close the command line window just yet because we still have work to do.
Step 2: Update Your Server
In Unix parlance, packages are essentially software. When it comes to any system, keeping its components up to date is critical, and servers are no exception.
When you use outdated software, you expose your server (and website) to security risks. Furthermore, you could be missing out on new features or improved performance. That's why you should start by updating your server's packages and downloading any pending security patches.
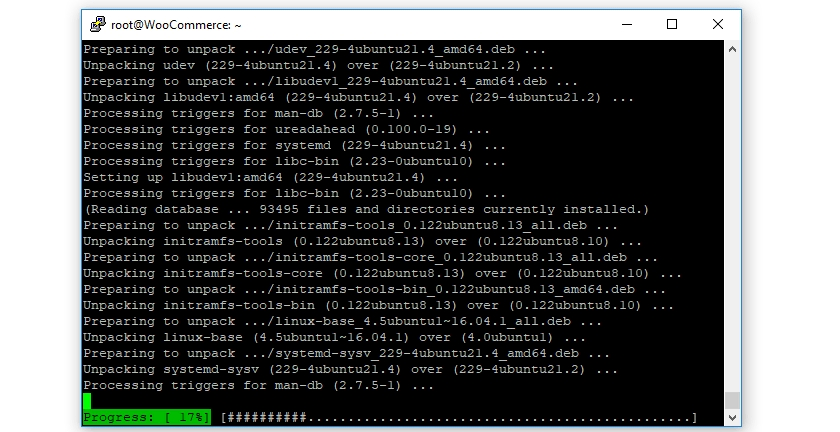
To begin, enter the apt update command and press Enter. Your server will now double-check which packages require upgrading. After that, run apt upgrade to update your server's packages:
This process may take some time, depending on how many updates your server requires. So sit back, grab a cup of coffee, and wait for it to be finished.
Once all of your packages are up to date, use the reboot command to restart your server. The command line window should then be closed. Wait a few minutes before logging back in with PuTTY (or your client of choice).
If everything went as planned, there should be no more available updates listed. That means we can proceed to the next step of learning how to set up a virtual private server.
Step 3: Create a New User and Change Their Privileges
When you set up a VPS, you begin with a root user, which is the account you've been using up to this point. However, it's always a good idea to create a second user account with superuser privileges.
The reason for this is that if you're not careful, the root account can cause serious damage. Because a root account has complete access to all of your system's settings, one incorrect command can cause serious problems.
A regular user account with superuser privileges, on the other hand, must prefix any command it wishes to run with administrative privileges with the sudo prefix. This may appear to be a minor adjustment, but it makes a significant difference. This method requires you to think twice before running any command with the sudo prefix, which can help you avoid mistakes.
Enter the following command to create that new user right now. You should change the second part to whatever username you want to use:
adduser yournewusername
Then, replace the placeholder with your new username in this line to add that user to the sudo group, which will grant it superuser privileges:
# usermod -aG sudo yournewusername
All that remains is to create a password for this account. However, there is a method that is far more secure than using a standard password, which we will discuss next.
Step 4: Enable Public Key Authentication
Public key authentication is a technique that is thought to be more secure than traditional passwords. This method generates a set of both 'public' and 'private' keys.
Your server will store your public key and use it to authenticate the private key, which will be stored as a file on your computer and only you will have access to. Once you've enabled public key authentication, you'll need both the private key and a password to log in, significantly increasing security.
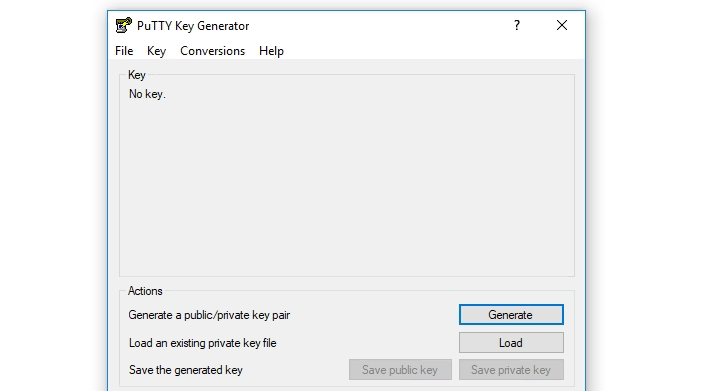
To generate SSH keys in Windows, use the
PuTTYgen app, which was installed when you installed the client earlier (for more information on how to do this on Linux/Unix systems, see this guide). Look for it in your programmes and launch the PuTTYgen app, which should look like this:
It is acceptable to use the default settings for your key pair, so click the Generate button now. The programme will ask you to move your mouse around to randomise your key to make it more unique, which is pretty cool:
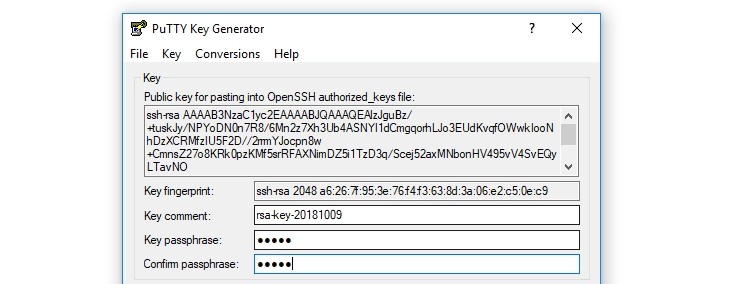
The programme will then display the public key it generated for you. Before you do anything else, create an accompanying pass that will serve as a password alongside the key:
Now, click the Save private key button to save the resulting file to your computer. Don't close this window just yet because you'll need to copy your public key shortly.
Then, log back in as the original root user and navigate to your new account's home directory with # su - yournewusername. Your new user will now be reflected in the command line:
Following that, you'll need to run a series of commands in order to create a new folder for your public key, restrict the permissions of that folder, and save your key:
mkdir ~/.ssh

chmod 700 ~/.ssh

nano ~/.ssh/authorized_keys
That last command will launch the Nano editor, allowing you to edit the newly created authorized_keys file on your server. Copy your public key from the PuTTYgen window and paste it in here now.
Once the key is ready, press CTRL + X to close the editor and enter Y when prompted to confirm the file changes. Then enter the following commands:
chmod 600 ~/.ssh/authorized_keys

exit
These will revert you to the root user after changing the permissions on the file you just edited.
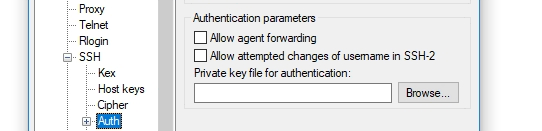
Next, set PuTTY to use your private key when connecting to your server so that it can recognise you. Return to the app's main screen and navigate to the Connection=>SSH=>Auth section. There is a field inside called Private key file for authentication:
Select the Browse button and navigate to the private key file you saved on your computer. Choose it, and you're ready to go.
Finally, you must instruct your server to disable the default password-only authentication method for the newly created user. To do so, use SSH to connect to your server as the new user and run the following command:
sudo nano /etc/ssh/sshd_config
This will launch the Nano editor and open the sshd config file. Inside that file, find the line that says PasswordAuthentication and remove the # sign before it. Then change its value from Yes to No so that it reads as follows:
PasswordAuthentication no
Save the file changes and restart your server. When you try to log in again, you'll only be able to do so using your private key and password.
Step 5: Configure Your VPS's Firewall
So far, we've covered a lot of ground in terms of how to set up a VPS. However, there is one more step to take if you want to keep your server secure. This is done by enabling a firewall for it.
You can accomplish this by using the
iptables programme, which allows you to create rules that limit traffic to and from your server. This step may appear to be excessive at first. However, with Iptables, you can control which ports allow traffic to access your server. This will put a stop to a lot of attacks. Furthermore, because it is a one-time setup procedure, it is advantageous to complete it as soon as possible.